

Good shop ventilation removes toxic fumes before you breathe them in. It also protects your equipment, your walls, and anyone else working nearby. If you weld indoors without a proper airflow plan, you risk lung damage, metal fume fever, and long-term health problems.
This guide walks you through the exact steps to set up safe, effective ventilation in your welding shop. You’ll learn which system fits your space, how to size it correctly, and what mistakes to avoid.
Welding fumes contain small particles and gases that can harm your respiratory system fast. A solid ventilation setup isn’t optional gear it’s a core part of shop safety, right alongside your helmet and gloves.
Why Welding Fumes Are Dangerous Without Proper Ventilation
Welding fumes contain metal oxides, gases, and fine particles that can damage your lungs over time. These particles are small enough to bypass your body’s natural defenses and settle deep in lung tissue.
Different metals create different hazards. Stainless steel welding releases hexavalent chromium, a known carcinogen. Galvanized steel releases zinc oxide fumes, which cause metal fume fever a short-term illness with flu-like symptoms. Even mild steel produces iron oxide particles that build up in your lungs over years of exposure.
According to industry experts and occupational safety researchers, long-term exposure to welding fumes is linked to increased risk of lung disease, and some studies suggest a connection to certain cancers. This risk grows in enclosed spaces where fumes have nowhere to go.
A ventilation system solves this problem at the source. It pulls contaminated air away from your breathing zone and replaces it with clean air, so fume concentration never reaches dangerous levels.
Optimal Ventilation Systems for Indoor Welding Shops
Three primary ventilation approaches protect indoor welding environments general dilution systems, local exhaust setups, and source-capture fume extraction arms each tailored to specific shop dimensions and operational volumes. While choosing the right ventilation setup maintains overall air purity, managing high-intensity arcs requires equal attention to individual personal protection; explore our detailed guide on prevent arc flash injuries and protect your eyes to ensure complete optical and respiratory defense across your facility.
General Dilution Ventilation
Dilution ventilation uses fans to mix contaminated air with large volumes of fresh air. This lowers the overall fume concentration in the room.
This method works best for small, occasional welding tasks in large, open shops. It’s the least effective option for heavy or continuous welding, since it doesn’t remove fumes it just spreads them thinner. For daily welding work, pair dilution ventilation with a stronger local system.
Local Exhaust Ventilation (LEV)
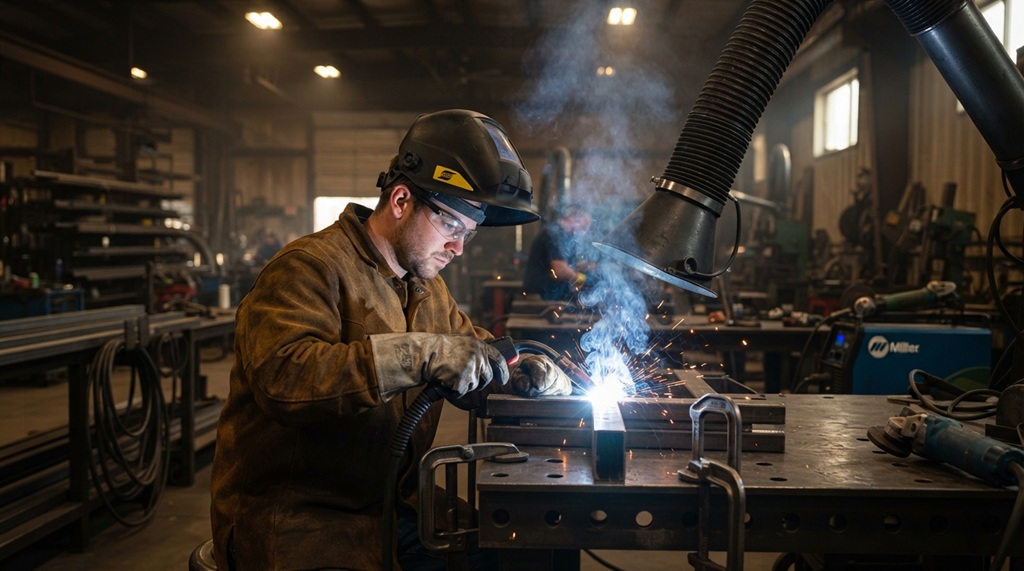
Local exhaust ventilation captures fumes right at the source, before they spread into the room. A hood or duct sits close to the weld area and pulls contaminated air directly outside.
LEV is the gold standard for most welding shops. It removes fumes at the point of creation, which means less airborne contamination overall. Fixed LEV systems work well for shops with a dedicated welding station.
Portable Fume Extractors
Portable fume extractors use flexible arms or nozzles that you position near your weld. Many models include filters, so you don’t need ductwork to the outside.
These units suit shops that move welding stations often, or shops without access to exterior walls for ducting. They cost more upfront than basic fans, but they offer flexibility that fixed systems can’t match.
How to Calculate the Right Airflow for Your Shop
Your ventilation system needs enough airflow to clear fumes faster than you produce them. Most professionals size this by calculating your shop’s air changes per hour (ACH).
For general welding work, aim for 6 to 10 air changes per hour in your shop space. Heavy or continuous welding may require higher rates, especially with materials like stainless steel or galvanized metal.
To calculate ACH, use this formula:
ACH = (Fan CFM × 60) ÷ Room Volume (cubic feet)
For example, a 20-foot by 30-foot shop with a 12-foot ceiling has a room volume of 7,200 cubic feet. To hit 8 air changes per hour, you’d need a fan rated at roughly 960 CFM.
Don’t rely on guesswork here. Undersized fans leave dangerous fume pockets in your shop, even if the system looks like it’s running fine.
Step-by-Step Setup Process for Indoor Welding Ventilation
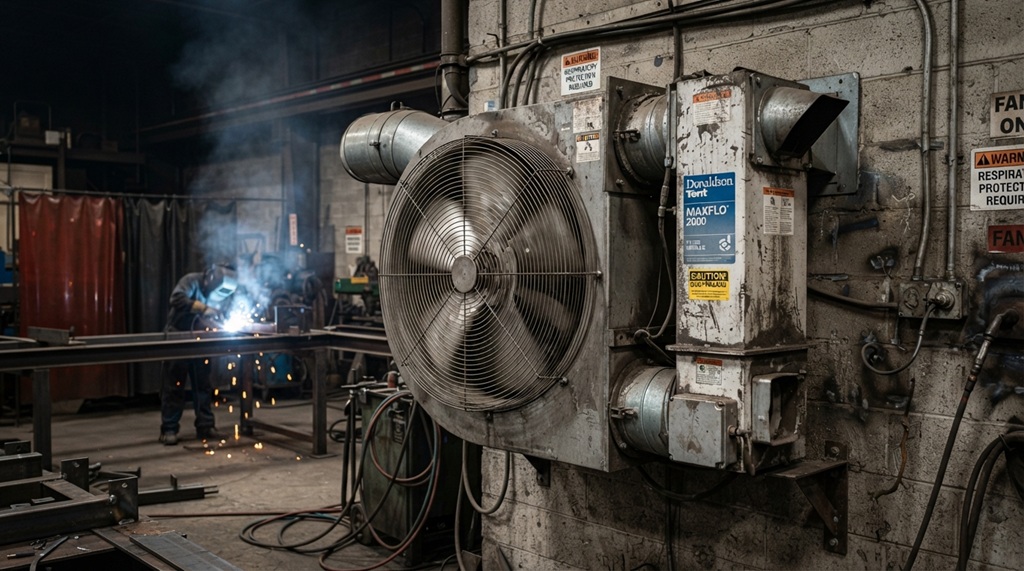
Setting up your ventilation system involves five main steps: assessing your space, choosing equipment, positioning your extraction points, sealing your workspace, and testing airflow.
Step 1: Assess Your Shop Layout
Start by mapping out where you weld most often. Note ceiling height, room dimensions, and any existing windows or exterior walls you can vent through.
Identify your primary welding materials too. Stainless steel and galvanized metal need stronger extraction than mild steel projects.
Step 2: Choose Your Equipment
Match your equipment to your welding frequency. Occasional hobby welders can often get by with a strong portable extractor. Shops running daily production welding need a fixed LEV system with proper ducting.
Check your fan’s CFM rating against the ACH calculation from the previous section. Buying underpowered equipment is one of the most common mistakes shop owners make.
Step 3: Position Your Extraction Points
Place extraction hoods or arms as close to the weld as possible, ideally within 6 to 12 inches of the arc. Fume capture drops sharply as distance increases even a foot of extra distance can cut effectiveness by half.
Avoid placing extraction points where cross-drafts from doors or fans will disrupt fume capture. A weak air current can push fumes away from your extractor instead of into it.
Step 4: Seal and Direct Airflow
Make sure your makeup air (the fresh air replacing what you exhaust) enters from a clean source, not from inside a dusty storage area. Poor makeup air planning creates negative pressure problems and pulls contaminated air back into your workspace.
If possible, direct fresh air intake toward the opposite side of the room from your extraction point. This creates a clean flow path across your entire shop.
Step 5: Test and Adjust
Once installed, test your system with a smoke pencil or fume visualization tool near the weld area. Watch whether fumes flow steadily toward your extraction point or drift into the room.
Adjust hood positioning, fan speed, or duct placement based on what you observe. A quick visual test catches problems that specs on paper can miss.
Common Ventilation Mistakes That Put Welders at Risk
Many shop owners make the same avoidable errors when setting up ventilation. Here’s what to watch for.
Relying on open doors alone. An open garage door helps, but it’s not a real ventilation plan. Wind direction changes, and fumes can still collect in corners away from the airflow.
Placing the extractor too far from the arc. Fume capture effectiveness drops fast with distance. A hood positioned two feet away captures far less than one positioned six inches away.
Ignoring makeup air. If your exhaust fan pulls air out faster than fresh air replaces it, you create negative pressure. This pulls fumes back through gaps, doors, and joints instead of pushing them out.
Skipping maintenance on filters. Fume extractor filters clog over time. A clogged filter cuts airflow dramatically, even though the fan sounds like it’s running at full power.
Using respirators as a replacement for ventilation. Respirators protect the welder, but they don’t clear the air for anyone else in the shop. Ventilation and respiratory protection work together one doesn’t replace the other.
Ventilation Requirements by Welding Process
Different welding processes produce different fume levels, so your ventilation needs shift depending on your method.
MIG welding tends to produce more visible fume than TIG welding, since it uses a continuously fed wire and higher amperage in many applications. Stick welding (SMAW) also generates significant fume, particularly with certain electrode coatings. TIG welding generally produces the least fume of the common processes, though it still requires basic ventilation.
If you switch between processes regularly, size your ventilation system for your heaviest fume-producing method. It’s easier to have extra capacity than to retrofit later.
Frequently Asked Questions
Do I need professional ventilation for occasional hobby welding?
Yes, even occasional welding benefits from proper airflow. A portable fume extractor or a strong fan positioned correctly can provide adequate protection for light, infrequent use. Skipping ventilation entirely, even for occasional projects, still exposes you to concentrated fumes in that moment.
Can I use a regular box fan for welding ventilation?
A box fan alone isn’t enough for regular welding work. It moves air around the room but doesn’t capture or remove fumes at the source. Use it only as a supplement to local exhaust ventilation, not as your main system.
How often should I replace fume extractor filters?
Filter replacement depends on your welding volume and material type, but most shops check filters monthly and replace them every three to six months. Heavy daily use may require more frequent changes. Check your manufacturer’s guidelines, since filter life varies by brand and model.
Is outdoor welding automatically safer than indoor welding?
Outdoor welding generally has better natural airflow, but wind direction still matters. Fumes can concentrate around your body even outdoors if there’s no breeze or if you’re working in a corner or against a wall. Indoor welding with proper ventilation can be just as safe as outdoor welding.
What ventilation setup works best for a small home garage shop?
A portable fume extractor with a flexible arm works well for most home garage setups, paired with an open door or window for makeup air. Position the extraction arm close to your weld point, within about a foot. This combination gives you both source capture and general airflow without major construction.
Final Thoughts
Safe indoor welding starts with ventilation that matches your shop size, welding frequency, and material choice. Local exhaust ventilation placed close to the arc gives you the best fume capture, while proper makeup air keeps your whole system working the way it should.
Take the time to calculate your airflow needs, position your equipment correctly, and test your setup before treating it as finished. A few hours of planning now can prevent years of respiratory damage later.