

TIG welding mild steel is one of the best ways to learn real control over an arc. Unlike MIG, the welder controls the torch, arc length, travel speed, and filler metal separately. That extra control can produce exceptionally clean, precise welds—but only when the machine is configured correctly. The good news is that mild steel TIG setup is fairly straightforward once you understand what each control actually does.
For a typical mild-steel job, you’ll generally use DCEN (DC electrode negative), 100% argon shielding gas, a pointed tungsten electrode, and an ER70-series filler rod. From there, amperage, tungsten diameter, cup size, gas flow, and technique change according to the material thickness and joint.
This guide walks through the setup from the gas cylinder to the first test bead, including practical starting settings, common mistakes, troubleshooting, and safety.
Important: The settings below are starting points, not a substitute for your welder’s manual, filler-metal manufacturer’s recommendations, a qualified welding procedure specification (WPS), or applicable code requirements. Critical structural, pressure-containing, lifting, automotive-safety, or other high-consequence welds should be performed by appropriately qualified personnel.
Quick Answer: Basic TIG Setup for Mild Steel
For a conventional mild-steel TIG weld, start with:
| Setting | Practical starting point |
| Process | GTAW / TIG |
| Polarity | DCEN / DC− |
| Shielding gas | 100% argon |
| Tungsten | 2% lanthanated or ceriated is a practical modern choice |
| Tungsten diameter | 1/16 in. for lighter work; 3/32 in. for general-purpose work |
| Tungsten tip | Sharpened point for DC steel |
| Cup | #6–#8 for many general applications |
| Gas flow | Roughly 15–20 CFH as a common starting range |
| Filler | ER70S-2 for clean mild steel |
| Arc start | HF start if available |
| Control | Foot pedal or torch amperage control if available |
| Post-flow | Enough to protect the hot tungsten; follow the machine’s guidance |
These values should be adjusted for material thickness, joint configuration, torch hardware, shielding-gas lens, welding position, and machine design. Miller, for example, recommends matching tungsten and cup size to the joint and identifies 3/32-inch tungsten with a #8 cup as a general TIG combination.
1. Start With the Right TIG Process
TIG is also called gas tungsten arc welding (GTAW). It uses a non-consumable tungsten electrode to establish the arc while an inert shielding gas protects the molten weld pool from atmospheric contamination. Filler metal is added separately when the joint requires it.
For ordinary carbon or mild steel, you normally want DC TIG, not AC TIG.
Set the machine to:
TIG + DC + electrode negative (DCEN/DC−).
DCEN puts the electrode on the negative side of the circuit and concentrates the majority of the useful welding heat into the workpiece. AC is primarily associated with materials such as aluminum where oxide removal is important.
If your machine has a polarity selector, don’t rely on memory alone. Confirm the setting in the owner’s manual.
2. Choose the Correct Shielding Gas
For mild-steel TIG, 100% argon is the normal starting choice.
You do not need a typical MIG shielding-gas mixture such as 75% argon/25% CO₂ for TIG mild steel. TIG requires an inert shielding environment around the tungsten and weld pool.
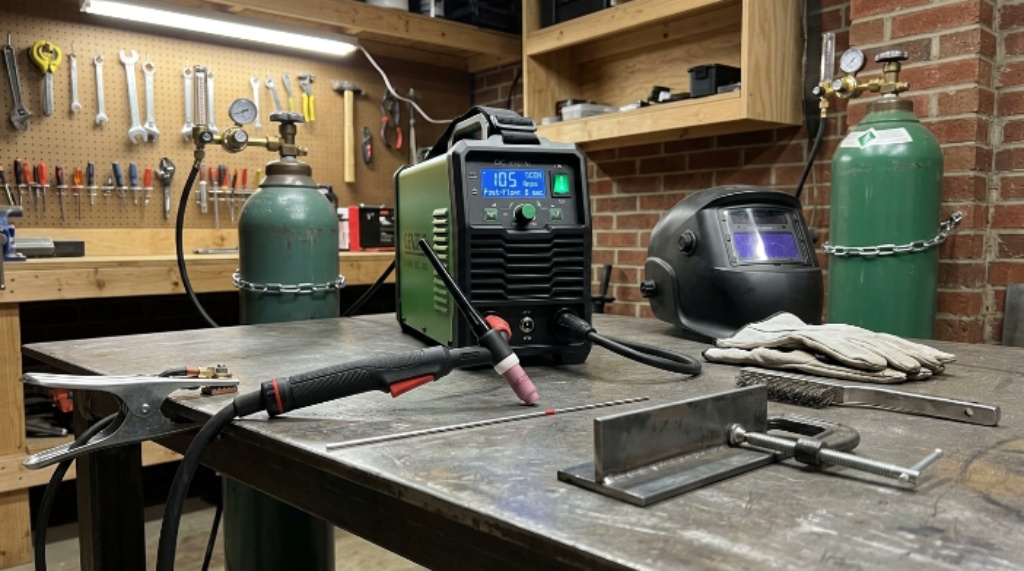
Connect the argon cylinder to a suitable regulator/flowmeter and inspect the hose, fittings, and torch connection before welding.
A useful starting flow is approximately 15–20 cubic feet per hour (CFH) for many conventional TIG setups. Miller also recommends checking this range when troubleshooting discoloration, tungsten problems, or inadequate shielding.
More gas does not automatically mean better shielding.
Excessive flow can create turbulence that actually pulls surrounding air into the shielding envelope. A large cup or gas lens may allow a different flow setting than a small standard cup.
If you are welding outdoors, remember that TIG shielding gas is easily disturbed by drafts. Even a properly adjusted flowmeter cannot compensate for strong air movement across the arc.
3. Select Your Tungsten
Tungsten selection is one area where older TIG articles can become confusing.
For DC TIG on mild steel, practical choices include 2% lanthanated and 2% ceriated tungsten. Thoriated tungsten has also been widely used for DC welding, but many welders now choose non-radioactive alternatives for general shop use.
For a beginner, 2% lanthanated tungsten is a particularly useful all-around choice because it works well for DC TIG and can also be useful if you later expand into AC TIG, depending on the machine and application.
Tungsten diameter starting points
| Material / application | Starting tungsten |
| Thin sheet and low amperage | 1/16 in. |
| General mild-steel TIG | 3/32 in. |
| Higher amperage / heavier work | 1/8 in. |
Do not choose tungsten diameter based only on material thickness. Maximum current, torch cooling, electrode type, and the machine’s recommendations also matter.
4. Grind the Tungsten Correctly
For DC TIG on mild steel, use a pointed tungsten.
Grind it lengthwise rather than creating deep circumferential scratches around the electrode. A dedicated tungsten grinder is ideal, but a clean grinding wheel reserved for tungsten can also work.
The important point is contamination control.
Do not grind tungsten on a dirty wheel that has been heavily used on steel, stainless, or other materials. Contaminated tungsten can introduce unwanted material into the arc.
A long, needle-like point is not automatically better. The exact point geometry should match your amperage and tungsten diameter.
For general beginner practice, concentrate on creating a consistent, centered point rather than chasing a perfectly exotic electrode geometry.
5. Select the Right Cup
The ceramic cup controls the shape and coverage of the shielding-gas envelope.
For general mild-steel TIG, a #6 or #8 cup is a practical starting point. Miller specifically identifies a #8 cup with 3/32-inch tungsten as a general TIG combination.
A gas lens can improve shielding and provide a smoother gas flow, particularly when you need additional tungsten stickout or better access around a joint.
However, don’t assume a bigger cup automatically solves shielding problems.
If the weld is discolored or porous, check:
- Gas flow.
- Gas leaks.
- Torch angle.
- Tungsten stickout.
- Cup condition.
- Gas-lens condition.
- Drafts around the work.
- Contamination on the material.
6. Pick the Filler Rod
For ordinary mild steel, ER70S-2 is an excellent TIG filler to keep in your shop.
Lincoln Electric identifies ER70S-2 specifically for TIG welding on grades of mild steel. Its chemistry includes deoxidizing elements that help it perform across a range of surface conditions.
Another common option is ER70S-6. Lincoln describes ER70S-6 as having higher silicon and manganese levels and notes its usefulness on slightly contaminated base material.
That does not mean you should skip cleaning.
The correct lesson is:
Choose the appropriate filler, then clean the steel anyway.
Typical filler diameters include:
- 1/16 in. for thinner material
- 3/32 in. for general-purpose work
- 1/8 in. for heavier joints
The filler diameter should match the joint, amperage, groove size, and desired deposition rate.
7. Set the Amperage
Amperage is where many beginner TIG guides oversimplify things.
You may hear rules such as “one amp per thousandth of an inch.” That can be useful as a rough mental starting point, but it should never be treated as a universal formula.
Joint design, fit-up, welding position, heat sinking, material condition, travel speed, and whether you are welding a butt joint or fillet joint can all change the required current.
A practical starting framework is:
| Mild-steel thickness | Approximate TIG starting range |
| 20–18 gauge | 35–70 A |
| 16–14 gauge | 50–90 A |
| 1/8 in. | 90–140 A |
| 3/16 in. | 130–180 A |
| 1/4 in. | 170–230+ A |
These are starting ranges, not guaranteed settings. A small inverter TIG machine may have limitations, while a larger machine may require a completely different approach for a production joint.
For thin material, controlling heat input becomes especially important. ESAB recommends TIG as a strong option for high-quality thin-material work and emphasizes small tungsten, 100% argon, proper technique, and heat control.
The best practice is simple:
Set a reasonable starting amperage, weld a test coupon made from the same material, and adjust from what the puddle and fusion tell you.
8. Configure Pre-Flow and Post-Flow
Two settings that beginners often ignore are pre-flow and post-flow.
Pre-flow
Pre-flow releases shielding gas before the arc starts.
Its purpose is to establish shielding around the tungsten and weld area before the arc creates a molten pool.
Too little pre-flow can expose the tungsten and initial weld area to air.
Post-flow
Post-flow keeps argon flowing after you stop welding.
This protects the hot tungsten while it cools.
Miller notes a practical post-flow guideline of approximately one second per 10 amps as a troubleshooting reference.
For example, a 100-amp weld might use roughly 10 seconds of post-flow as a starting reference, subject to the machine’s control range and torch setup.
If the tungsten turns blue, gray, or becomes contaminated after stopping the arc, check post-flow before immediately changing other settings.
9. Use HF Start When Available
If your TIG machine has high-frequency start, use it for normal TIG work unless your application or machine instructions call for something different.
HF start lets the arc initiate without physically touching the tungsten to the workpiece.
That matters because touching the tungsten to the steel can contaminate the electrode.
If your machine only has lift-arc or scratch-start TIG, you can still weld mild steel successfully. You simply need more control during arc initiation.
10. Set the Foot Pedal or Torch Control
A foot pedal gives you dynamic amperage control.
You might set the machine for a maximum of 120 amps, for example, but that does not mean you have to weld at 120 amps continuously.
You can start the puddle with more current, reduce current as the workpiece heats, and back off before reaching an edge or stopping point.
This is one of TIG’s biggest advantages.
If your machine uses a torch-mounted amperage control instead of a foot pedal, the same principle applies.
For beginners, it is usually better to learn what the puddle is telling you rather than obsessing over keeping the pedal at one exact position.
11. Prepare the Mild Steel Before You Strike an Arc
TIG is unforgiving of contamination.
Before welding, remove:
- Oil and grease
- Paint
- Heavy rust
- Dirt
- Moisture
- Loose mill scale
- Coatings and unknown residues
Grind or mechanically clean the weld area, then wipe it with an appropriate solvent where suitable.
Also clean your filler rod.
Do not place dirty filler rod directly into the weld pool and then blame the machine for porosity.
One of the biggest advantages of practicing TIG on clean coupons is that it removes variables. If the metal is clean, the tungsten is clean, the gas is correct, and the settings are reasonable, technique becomes much easier to evaluate.
12. Assemble the Torch
A typical torch setup consists of:
- Tungsten electrode
- Collet
- Collet body or gas lens
- Ceramic cup
- Back cap
- TIG torch
- Shielding-gas hose
Insert the tungsten so that the appropriate amount extends beyond the cup.
For general work, don’t start with excessive stickout. A modest extension is easier to shield and gives you a more forgiving arc.
Longer stickout can be useful for tight joints or specialized applications, but it generally requires better gas coverage.
13. Connect the Work Lead Correctly
For DCEN TIG on mild steel:
Torch/electrode → negative (−)
Work clamp → positive (+)
Connect the work clamp directly to clean metal whenever possible.
A poor work connection can create strange symptoms that look like a machine or tungsten problem.
Make sure the clamp jaws actually bite into conductive metal rather than sitting on thick paint, rust, or contamination.
14. Run a Test Bead Before the Real Joint
This step is easy to skip—and one of the most valuable.
Use a piece of mild steel that matches the thickness and general condition of the actual workpiece.
Start the arc and establish a small puddle.
Then watch:
- Puddle size
- Fusion at the edges
- Arc stability
- Tungsten behavior
- Gas coverage
- Travel speed
- Bead width
- Penetration
Don’t change five settings at once.
If the puddle is too large, reduce current or increase travel speed.
If you cannot establish adequate fusion, increase current, slow down slightly, improve fit-up, or reassess the joint design.
And if the weld is contaminated, stop and identify the contamination source instead of simply turning up the amperage.
15. Basic TIG Technique for Mild Steel
Hold the torch at a comfortable angle—generally around 10–20 degrees from vertical for many flat-position applications.
Keep the arc short and consistent.
A long arc spreads the heat and makes shielding less effective. A very short arc increases the risk of dipping the tungsten into the puddle.
Move the torch smoothly.
If using filler, add small amounts of rod to the leading edge of the puddle rather than aggressively stabbing the rod into the molten metal.
A useful beginner sequence is:
Establish puddle → move steadily → add small amounts of filler → watch both puddle edges → maintain arc length.
Do not stare only at the bright center of the arc. Learn to read the puddle’s edges and how they wash into the base metal.
Common TIG Mild-Steel Problems and Fixes
Porosity
Possible causes include:
- Low or disrupted shielding-gas coverage
- Wind or drafts
- Gas leak
- Dirty material
- Dirty filler
- Contaminated tungsten
- Incorrect torch angle
- Excessive tungsten stickout
Check the gas system before changing amperage.
Tungsten Keeps Getting Contaminated
You may be:
- Touching the tungsten to the puddle
- Touching the tungsten to filler
- Using too much current for the electrode
- Running insufficient shielding
- Holding an excessively long arc
Stop, let the electrode cool if necessary, grind away the contaminated section, and restart with a clean point.
The Weld Is Gray, Black, or Discolored
Check shielding.
Look at gas flow, leaks, cup size, torch angle, tungsten extension, post-flow, and air movement around the weld.
Miller identifies gas-flow problems and incorrect setup as common causes of tungsten discoloration and related TIG defects.
The Weld Burns Through
Usually you’re putting too much heat into the material for the joint.
Try:
- Lower amperage
- Faster travel
- Shorter weld segments
- Better fit-up
- Smaller filler
- Pulsing, if appropriate
- A heat-sinking fixture
Thin sheet metal requires especially careful heat management.
The Bead Sits on Top
Possible causes include insufficient heat, excessive travel speed, poor joint preparation, or an overly large filler rod.
Look at the edges of the bead.
A pretty bead is not automatically a sound weld. Fusion into both sides of the joint matters.
A Simple Mild-Steel TIG Setup Checklist
Before welding, verify:
- Machine is in TIG mode
- DCEN/DC− polarity is selected
- 100% argon is connected
- Cylinder is secured upright
- Gas flow is set
- Tungsten is clean and properly ground
- Correct cup and collet are installed
- Filler rod matches the steel and joint
- Work clamp has a clean electrical connection
- Metal has been properly cleaned
- Pre-flow and post-flow are configured
- Amperage is appropriate for thickness
- Helmet and PPE are in place
- Ventilation is adequate
- A test coupon is available
TIG Mild Steel Safety: Don’t Treat the Process as Harmless
TIG produces less visible smoke and spatter than many other welding processes, but that does not make it risk-free.
OSHA identifies welding hazards including metal fumes, ultraviolet radiation, burns, eye damage, electrical shock, and other physical hazards. Appropriate work practices, ventilation, and PPE are required to control those risks.
Use an appropriate welding helmet, safety glasses, gloves, flame-resistant clothing, and suitable footwear.
Ventilation is particularly important. OSHA’s welding requirements address mechanical ventilation and protection during welding operations.
Your argon cylinder also needs proper handling. OSHA requires compressed-gas cylinders to be secured upright in applicable workplace settings, rather than left loose where they can fall.
Never weld on containers or metal that may contain flammable residues unless the work has been properly evaluated and made safe.
Frequently Asked Questions
What polarity should I use for TIG welding mild steel?
Use DCEN, also called DC electrode negative or DC−, for conventional TIG welding of mild steel. Always confirm the polarity against the welder manufacturer’s instructions.
What gas should I use for TIG welding mild steel?
Use 100% argon as the normal shielding gas. A common starting flow is approximately 15–20 CFH, but actual requirements depend on torch hardware, cup size, gas lens, drafts, and the welding application.
What tungsten is best for mild-steel TIG?
2% lanthanated or ceriated tungsten are practical choices for DC TIG. Thoriated tungsten is also an established option, but many welders prefer non-radioactive tungsten alternatives for general work.
What size tungsten should I use?
For many general-purpose mild-steel jobs, 3/32 inch is a useful starting size. Use 1/16 inch for lighter work and move to 1/8 inch when the amperage and application justify it.
What filler rod should I use for mild steel TIG?
ER70S-2 is a common and highly useful choice for clean mild steel. ER70S-6 is another option and can be advantageous when the base material has some surface contamination, although proper cleaning remains the preferred practice.
Do I need AC to TIG weld mild steel?
No. Mild steel is normally TIG welded using DCEN. AC is generally used for materials such as aluminum where alternating-current cleaning action is beneficial.
How many amps do I need to TIG weld 1/8-inch mild steel?
A reasonable starting range is approximately 90–140 amps, but the actual setting depends on joint design, fit-up, welding position, heat sinking, tungsten, filler, and technique.
Why does my TIG weld look dirty?
Start by checking contamination and shielding. Clean the steel, clean the filler, regrind contaminated tungsten, check gas flow and leaks, reduce excessive torch angle or tungsten stickout, and protect the weld from drafts.
Can I TIG weld mild steel without filler rod?
Yes. TIG can be performed autogenously when the joint design and material thickness allow the edges to fuse without added metal. However, many joints require filler to achieve the required geometry, strength, or dimensional requirements.
Should I use pulse TIG on mild steel?
Pulse can be useful for controlling heat input, especially on thinner material, but it is not mandatory. Learn basic DC TIG technique first. If your machine has pulse controls, follow its manual and use test coupons to establish useful peak current, background current, pulse frequency, and duty cycle.
Final Takeaway
Setting up a TIG welder for mild steel isn’t about finding one “perfect” amperage or copying someone else’s machine settings.
A reliable setup comes from getting the fundamentals right:
DCEN polarity + 100% argon + clean steel + clean tungsten + suitable filler + correct gas coverage + controlled arc length + a properly sized tungsten and cup.
Once those pieces are in place, use your first test bead as feedback. Adjust one variable at a time and pay attention to fusion, puddle behavior, tungsten condition, and shielding—not just whether the bead looks shiny.
That approach is much more repeatable than memorizing a chart.
For general TIG work, current manufacturer guidance continues to emphasize correct tungsten/cup selection, shielding-gas control, material preparation, and process-specific settings rather than one universal setup.
And remember: a good-looking TIG bead is not proof of a sound weld. For safety-critical work, the required welding procedure, material specification, welder qualification, inspection method, and applicable AWS/API/ASME/other governing requirements take priority over any generic internet guide.