

The fastest way to test MIG welder performance before buying is to run a live bead on scrap metal, check the arc for spatter and consistency, and push the machine near its rated duty cycle to see if it overheats. A spec sheet can tell you the amperage range and duty cycle rating, but it can’t tell you how the machine actually feels in your hands or how it behaves under real shop conditions.
Too many welders buy based on price or brand reputation alone, then discover weeks later that the wire feed hunts and surges, the arc is unstable at low voltage, or the machine trips out after ten minutes of continuous work. This guide walks through the exact hands-on tests, both in-store and at home during a return window, that separate a solid MIG welder from one that will frustrate you on every project.
Whether you’re comparing two machines side by side at a welding supply store or evaluating a unit you already brought home, these tests apply the same core principles: put the machine under load, watch how it responds, and trust what you see over what the box promises.
Why Spec Sheets Don’t Tell the Whole Story
Manufacturer spec sheets list numbers like amperage range, duty cycle, and wire feed speed, but they don’t capture how a machine performs in real-world welding conditions. Two welders with identical spec sheets can weld completely differently once you strike an arc.
Duty cycle ratings, for example, are usually measured in a controlled lab environment at a specific ambient temperature, often around 104°F (40°C) per NEMA or IEC testing standards. Your garage or shop rarely matches that environment exactly, and voltage fluctuations from your outlet or extension cord length can also affect actual performance. A machine rated for a 30% duty cycle at 140 amps might behave differently once you’re welding in a hot shop in July with a long extension cord.
This is why hands-on testing matters more than reading a brochure. The numbers on paper are a starting point for comparison, not a guarantee of how the welder will perform on your bench.
Testing Arc Stability and Weld Bead Quality
The clearest sign of a good MIG welder is a smooth, consistent arc that produces an even bead without excessive popping or spatter. Bring a few pieces of scrap steel of varying thickness (16-gauge, 3/16-inch, and 1/4-inch if possible) and actually weld with the machine before deciding.
What to Look For in the Arc
Watch and listen to the arc itself. A healthy MIG arc has a steady, consistent “sizzling bacon” sound rather than a popping or crackling noise, which usually signals incorrect voltage-to-wire-speed matching or an unstable arc from the machine itself. If the arc looks jumpy or the puddle seems to surge and shrink unevenly even after you’ve dialed in the settings correctly, that’s a red flag worth noting.
Inspecting the Finished Bead
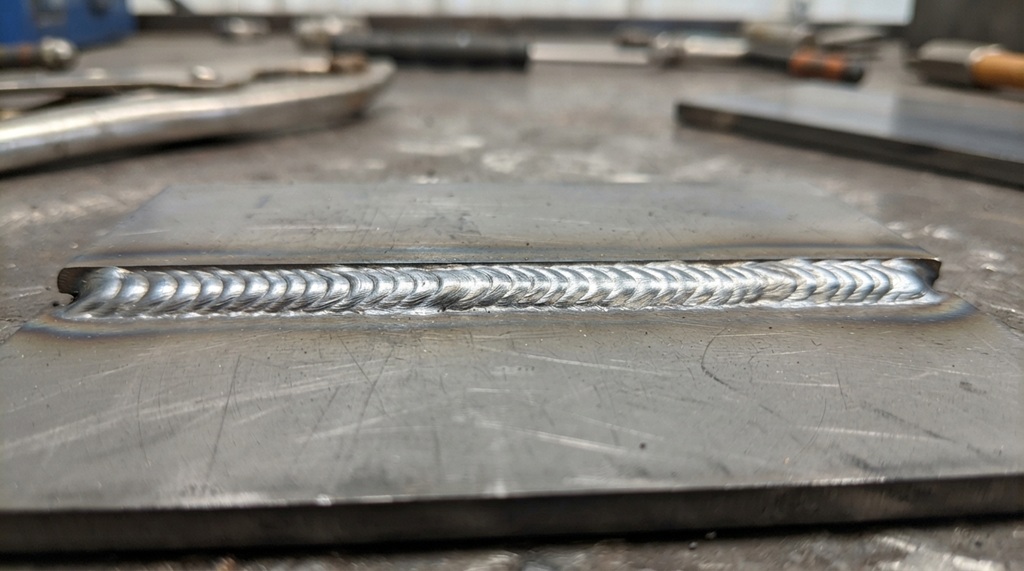
Once you’ve run a few passes, let the metal cool and inspect the bead. You’re looking for consistent ripple pattern, minimal spatter scattered around the weld, and good tie-in at the edges without undercut. Excessive spatter isn’t always the machine’s fault it can come from wire type, shielding gas mix, or technique but if spatter is heavy even with correct settings and clean wire, that points to inconsistent voltage output from the machine.
Checking Wire Feed Consistency
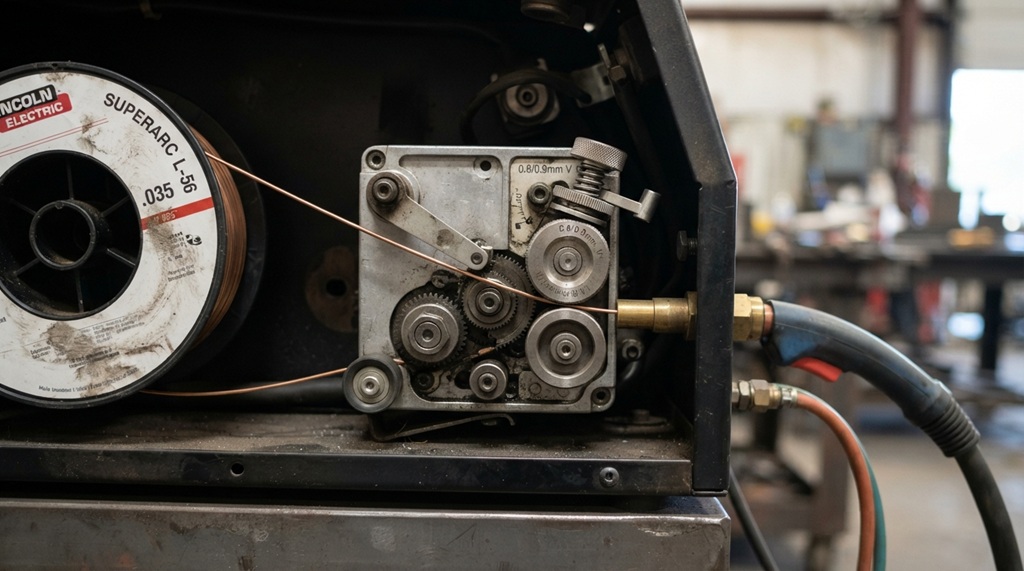
Reliable wire feed is one of the most common failure points in budget MIG welders, so test it directly by running wire at both low and high feed speeds. A quality feed motor should deliver wire smoothly without hesitation, birdnesting, or noticeable speed surges.
Running the Feed Test
With the gun trigger held and no arc struck (test outside the workpiece or with the machine set to a wire-feed test mode if it has one), watch the wire come out of the tip. It should move at a steady, even pace. Pulsing, jerking, or momentary stalls in the feed usually point to a weak or poorly calibrated feed motor, worn drive rollers, or tension issues that will only get worse over time.
Testing Under Load
Feed problems often only show up once you’re actually welding, since the resistance of the arc and puddle changes the demands on the motor. Run a continuous bead for at least 12–18 inches and watch for any hiccup in feed speed that shows up as an inconsistent bead width or a stutter in the arc sound. If the machine hunts and surges speeding up and slowing down in a repeating pattern that’s a wire feed problem worth walking away from.
Pushing the Duty Cycle Under Real Load
Duty cycle testing means running the welder near its maximum rated amperage for as long as the rated cycle allows, then checking how it handles the cool-down and whether it trips a thermal overload. This is the single most revealing test for whether a machine can handle real project work, not just short tack welds.
Set the machine to a higher amperage within its rated range and run continuous beads, timing how long you weld versus how long you rest, matching the duty cycle percentage listed on the spec plate. For example, a 30% duty cycle at 140 amps means roughly 3 minutes of welding out of every 10-minute period at that amperage. If the machine shuts down well before that window, or if it takes far longer than expected to cool down and reset, the actual duty cycle may not match the advertised rating.
Pay attention to the thermal shutdown behavior too. A well-engineered machine will give a warning light or indicator before cutting power, and it should resume relatively quickly once it cools. A machine that shuts down abruptly with no warning, or takes an unusually long time to reset, suggests weaker internal cooling or a less capable transformer or inverter.
Evaluating Hardware Durability and Control Interfaces
A machine’s physical construction serves as the ultimate indicator of its long-term operational lifespan. Before striking your first test arc, conduct a rigorous visual audit of the exterior housing, dynamic control dials, heavy-duty cabling, and MIG gun assembly, as cheap componentry almost always signals premature wear. Safety remains paramount during this evaluation phase; prior to testing for smooth wire delivery and joint penetration, ensure you are fully protected with elite-grade gear to choose the best welding helmet for ultimate protection to keep your eyes shielded from harmful UV emissions and bright arc flash.
Housing and Internal Components
Lift the machine slightly to gauge weight a welder that feels unusually light for its rated output sometimes uses thinner-gauge transformers or smaller cooling fans, which can affect performance under sustained use. If you can see through vents, look for a solid fan and clean internal layout rather than crowded, loosely secured wiring.
Dials, Switches, and Gun Assembly
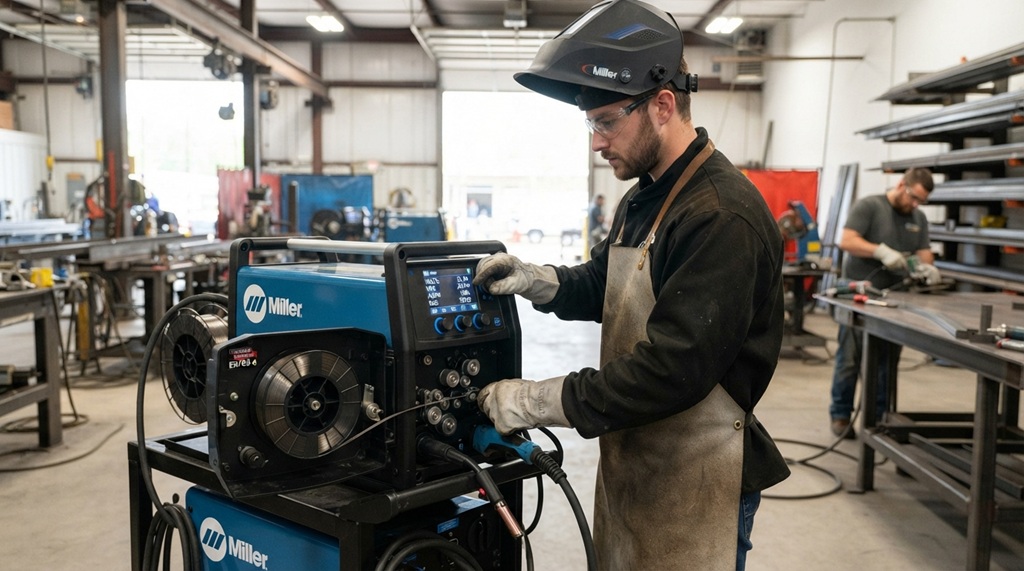
Turn every dial and flip every switch. They should move with firm, consistent resistance rather than feeling loose or wobbly. Check the MIG gun trigger for a clean, responsive click, and flex the gun cable and ground clamp cable to check for stiffness or exposed wiring, since these are common wear points that get replaced far sooner on lower-quality machines.
A Test Most Buyers Skip: The Cold-Start and Voltage-Sag Check
Most guides stop at arc quality and duty cycle, but one test that reveals a lot about a machine’s real-world reliability is how it performs on a cold start after sitting unused, and how it handles voltage sag when other equipment shares the same circuit.
Many shops and garages run a MIG welder on the same circuit as other tools, or on an older electrical system that isn’t perfectly stable. Plug the welder in, let it sit idle for a few minutes, then strike an arc immediately and watch the first few seconds closely some cheaper inverters have a noticeable stutter or weak arc start before settling into a normal output. Separately, if you have access to another tool on the same circuit (a shop vac, compressor, or grinder), run it briefly while welding to see if the arc dips or the machine hesitates. Better-built inverter machines have voltage compensation circuitry that keeps the arc steady even with minor input fluctuations, while budget units can visibly falter. This single check often exposes the difference between a machine built for hobby use and one built to hold up in a working shop.
Frequently Asked Questions
Can I test a MIG welder’s performance without buying it first?
Yes, many welding supply stores allow in-store test welds on scrap metal, and some let you try a demo unit before purchase. If a retailer won’t allow any hands-on testing, ask about their return policy so you can test at home within a defined window.
How long should I run a MIG welder to properly test duty cycle?
Run the machine at a mid-to-high amperage within its rated range for the full duration listed on its duty cycle rating, then observe the cool-down time. A short 30-second test won’t reveal thermal issues, so plan for several minutes of near-continuous welding to see true performance.
What’s the biggest red flag when testing a MIG welder?
Inconsistent wire feed hesitation, surging, or birdnesting is one of the most common and frustrating issues, since it directly affects weld quality on every single project. An unstable arc that doesn’t improve after adjusting voltage and wire speed is a close second red flag.
Does a higher price always mean better performance?
Not necessarily. Price often reflects features like multi-process capability, aluminum welding support, or brand reputation, but actual arc stability and build quality should still be tested directly rather than assumed from price alone.
Should I test with the same wire and gas I plan to use long-term?
Yes, testing with your actual project’s wire type, diameter, and shielding gas mix gives the most accurate picture, since performance can shift noticeably between flux-core, solid wire, and different gas blends.
Conclusion
Testing MIG welder performance before buying comes down to putting the machine under real conditions: run actual beads on scrap metal, check wire feed consistency at multiple speeds, push the duty cycle to its rated limit, and inspect the build quality up close. Spec sheets are a useful starting point, but they can’t replace watching and listening to how a machine actually welds. Add the cold-start and voltage-sag check to your routine, and you’ll catch reliability issues that most buyers never think to test until it’s too late after the return window has closed.