
Stick welding has a reputation for being simple: grab a welder, clamp in a rod, strike an arc, and start welding. The equipment really is straightforward. Learning to make a consistent, structurally sound weld is another story. Stick welding—formally called shielded metal arc welding (SMAW)—requires you to control the arc, electrode angle, travel speed, puddle, and heat while the electrode is continuously getting shorter. The flux coating on the electrode creates shielding around the arc and produces slag that must be removed after welding.
That combination makes SMAW extremely useful for repair work, fabrication, maintenance, field welding, and outdoor applications. It also makes stick welding a valuable skill for beginners who are willing to practice deliberately rather than simply trying to “make a bead.”
This guide explains the fundamentals, electrode selection, machine setup, technique, common problems, safety, and a practical progression for learning stick welding.
Safety note: This is an educational beginner’s guide, not a substitute for welding training, applicable welding codes, the welder manufacturer’s instructions, electrode manufacturer’s instructions, or a qualified welding professional. Never use beginner practice as a basis for critical structural, pressure-containing, lifting, vehicle-frame, or safety-related repairs.
What Is Stick Welding?
Stick welding uses a flux-coated consumable electrode to create an electric arc between the electrode and the workpiece.
The heat from that arc melts both the electrode and a portion of the base metal. The molten electrode becomes filler metal, while the electrode’s flux coating produces shielding gases and a layer of slag that protects the cooling weld metal.
Unlike MIG welding, stick welding does not require a separate shielding-gas cylinder. That is one reason SMAW remains useful in outdoor and field environments. AWS describes SMAW as a versatile process that can operate with relatively basic equipment and in locations where other welding processes may be less practical.
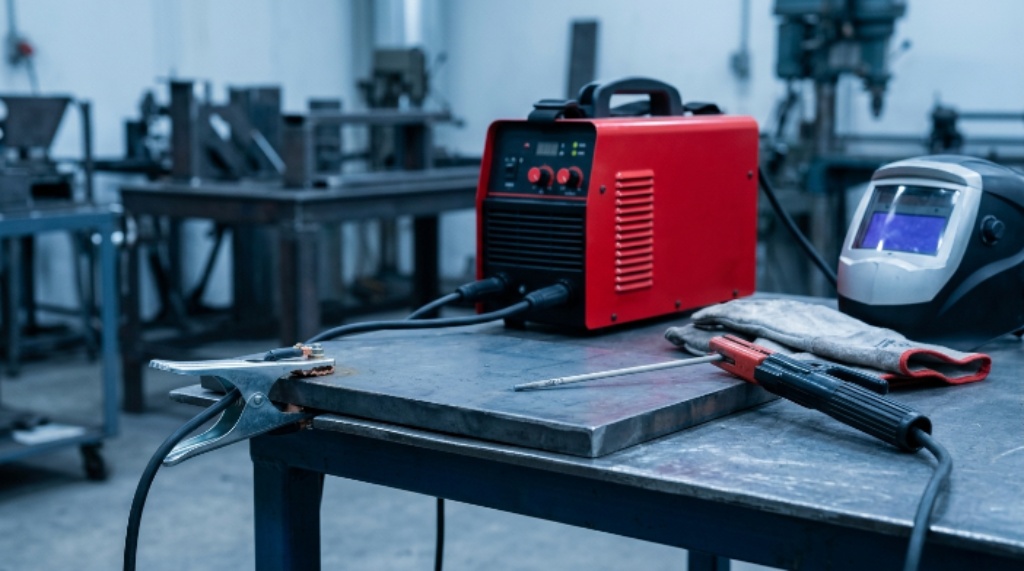
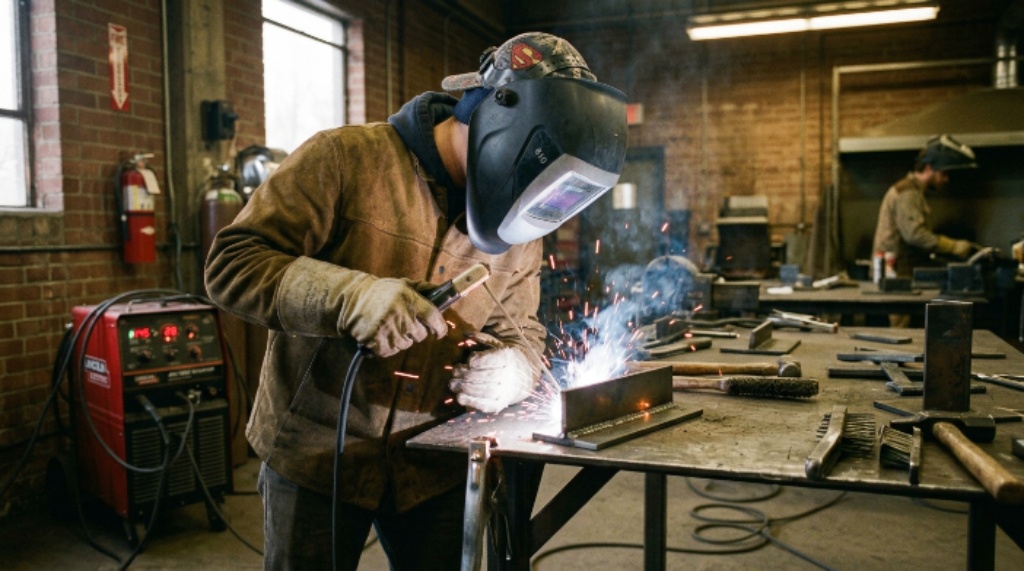
The basic setup consists of:
- A constant-current stick welder
- Electrode holder
- Work/ground clamp
- Welding leads
- Correct electrode
- Welding helmet
- Welding gloves
- Flame-resistant clothing
- Safety glasses
- Chipping hammer
- Wire brush
- Suitable ventilation and fire protection
The simplicity of the equipment should not be confused with simplicity of technique.
Why Learn Stick Welding?
SMAW remains relevant because it offers several practical advantages.
1. No external shielding-gas cylinder
The electrode’s flux provides the shielding needed for the welding arc. That makes the process more portable than gas-shielded processes.
2. It works well outdoors
Stick welding is less dependent on an external shielding-gas envelope, so it is commonly used in field environments. Wind can still affect the arc and work conditions, however, and outdoor welding does not eliminate fire, fume, electrical, or UV hazards.
3. The equipment can be relatively simple
A basic SMAW setup requires fewer components than many gas-shielded welding systems.
4. It is useful for thicker steel and repair work
With the right electrode, joint preparation, amperage, and technique, stick welding is well suited to many heavier steel applications.
5. It teaches fundamentals
SMAW forces beginners to learn skills that transfer to other welding processes: reading the puddle, controlling travel speed, understanding heat input, maintaining joint alignment, and recognizing weld defects.
The downside is that stick welding requires more manual control than many beginners expect.
What Equipment Does a Beginner Actually Need?
You do not need an elaborate shop to begin practicing SMAW, but you do need the right basic equipment.
Welding machine
Use a machine specifically rated for stick/SMAW welding. Many modern multiprocess machines include SMAW mode.
Before plugging in the machine, read its manual. Pay attention to input voltage, output range, duty cycle, electrode compatibility, and grounding instructions.
OSHA requires arc-welding equipment to be selected and installed appropriately and states that designated operators should be properly instructed and qualified for the equipment they operate.
Electrode holder and work clamp
Inspect leads, connectors, insulation, and the holder before welding. Damaged cables or connections can create shock and overheating hazards.
Welding helmet
Use a welding helmet with an appropriate filter shade for the process and current. OSHA’s PPE guidance identifies welding helmets or shields as necessary protection against the optical radiation produced by electric-arc welding.
Other essentials
Keep these nearby:
- Safety glasses
- Proper welding gloves
- Flame-resistant jacket or clothing
- Leather boots
- Chipping hammer
- Wire brush
- Angle grinder where appropriate
- Clamps
- Fire extinguisher suitable for the work environment
- Adequate ventilation or local exhaust
Do not weld in ordinary sneakers, shorts, synthetic clothing, or clothing with exposed skin around the wrists and neck.
Which Stick Welding Rod Should a Beginner Use?
One of the biggest beginner mistakes is treating all welding rods as interchangeable.
They are not.
The electrode classification tells you important information about the electrode’s properties and intended use.
For common mild-steel electrodes:
| Electrode | General Character | Typical Beginner Consideration |
| E6010 | Deep penetration, forceful arc | Excellent for certain root-pass and pipe applications, but less forgiving for beginners |
| E6011 | Penetrating, versatile, available for AC/DC applications depending on product | Useful for repair work and less-than-perfect surfaces when the specific electrode permits it |
| E6013 | Softer, smoother arc and generally easy slag release | Often a friendly starting point for clean mild-steel practice |
| E7018 | Low-hydrogen electrode with stronger deposited weld metal | Excellent electrode, but storage, handling, and technique matter more |
These descriptions are general. The exact operating characteristics depend on the specific electrode manufacturer’s product and the applicable welding procedure.
For example, Lincoln Electric describes its E6013 Fleetweld 37 electrode as an all-position electrode intended primarily for clean steel, with a stable arc and low spatter characteristics.
What do the numbers mean?
Take E7018 as an example:
- E = electrode
- 70 = approximately 70,000 psi minimum tensile strength of deposited weld metal
- 1 = all-position classification
- 8 = identifies the electrode’s coating/current characteristics under the AWS classification system
The classification system contains more detail than a beginner needs to memorize. The important point is that the numbers are not random—they tell you something about the electrode’s capabilities.
Always use the electrode manufacturer’s data sheet for the exact electrode you purchased.
What Size Rod Should You Use?
Electrode diameter affects the amount of current required and the amount of metal deposited.
Common sizes include:
- 3/32 inch
- 1/8 inch
- 5/32 inch
For a beginner practicing on clean mild-steel coupons, 3/32-inch or 1/8-inch electrodes are often practical starting sizes, provided the material thickness and welder output are appropriate.
Do not select the rod solely because “bigger is better.”
A larger electrode generally requires more current and can put substantially more heat into the workpiece. A smaller electrode may provide better control when working with lighter material.
The correct choice depends on:
- Base-metal thickness
- Joint design
- Welding position
- Electrode classification
- Machine output
- Required penetration
- Manufacturer recommendations
How to Set Amperage
There is no single amperage setting that works for every 1/8-inch rod.
That’s because amperage depends on the electrode type, diameter, welding position, joint, material, and manufacturer specifications.
Start with the current range printed on the electrode package or manufacturer’s data sheet.
Then learn to read the weld.
Amperage that is too low may produce:
- Rod sticking
- Difficult arc starts
- Tall or narrow beads
- Poor fusion
- Excessive slag interference
Amperage that is too high may produce:
- Excessive spatter
- Undercutting
- Excessive penetration
- A very fluid puddle
- Burn-through on thinner material
Do not automatically turn the machine up every time the rod sticks. Check arc length, polarity, electrode condition, joint cleanliness, and starting technique first.
AC, DCEN, and DCEP: What Does Polarity Mean?
This is another area where beginners frequently get confused.
With DC welding, polarity determines how electrical current flows through the circuit.
You may encounter:
- DCEN — direct current electrode negative
- DCEP — direct current electrode positive
- AC — alternating current
Different electrodes are designed for different current types and polarities. Some can operate on more than one.
There is no universal “best polarity” for stick welding.
Use the polarity specified by the electrode manufacturer and your welding machine.
For example, changing from one electrode classification to another can require a different current type or polarity. Never assume that because a rod physically fits the holder, it will run correctly on the same settings as your previous electrode.
How to Strike a Stick Welding Arc
Starting the arc is one of the first skills you should practice separately from making joints.
There are two common methods.
Scratch start
Think of it like striking a match.
- Position the electrode close to the work.
- Lightly scratch the electrode across the steel.
- Lift it just enough to establish the arc.
- Immediately establish a short, controlled arc length.
Tap start
- Position the electrode close to the work.
- Tap it against the steel.
- Lift slightly as the arc establishes.
- Maintain the correct arc length.
If the electrode sticks, don’t panic.
Break the arc, safely free the electrode, inspect the tip, and try again. Repeated sticking usually means something needs attention—often amperage, arc length, starting technique, polarity, or electrode selection.
Master Arc Length Before Trying Fancy Bead Patterns
Arc length is simply the distance between the end of the electrode and the workpiece.
This is one of the most important skills in SMAW.
A long arc can cause:
- Excessive spatter
- Porosity
- An unstable arc
- Poor bead control
- Increased atmospheric contamination
An arc that is too short can cause the electrode to stick.
A useful beginner principle is to maintain a short, consistent arc, with the exact technique adjusted for the electrode being used.
As the electrode burns down, your hand has to move closer to the workpiece.
That’s why stick welding requires constant coordination.
Miller identifies current setting, arc length, electrode angle, manipulation, and travel speed as five fundamental elements of stick-welding technique.
Electrode Angle and Travel Speed
For basic flat-position practice, beginners commonly use a slight drag angle rather than trying to push aggressively.
The exact angle depends on electrode type, joint configuration, position, and welding procedure.
The most important thing is to control the puddle.
Travel too fast
You may produce:
- A narrow bead
- Poor sidewall fusion
- Insufficient deposition
- An irregular appearance
Travel too slowly
You may produce:
- An excessively wide bead
- Too much reinforcement
- Excessive heat
- Undercutting or other problems depending on the circumstances
Don’t focus exclusively on making a pretty bead.
Watch the molten puddle.
The puddle is giving you real-time information about your heat, speed, and control.
Should You Clean the Metal Before Stick Welding?
Absolutely.
Stick welding is relatively tolerant of less-than-perfect surfaces, but that does not mean you should weld through dirt, paint, oil, heavy rust, or unknown coatings.
For beginner practice:
Clean the steel first.
Remove rust, mill scale, paint, grease, and other contamination from the immediate welding area as appropriate for the material.
A clean workpiece makes it much easier to determine whether a problem comes from your technique or from contamination.
Miller also recommends cleaning the material even though SMAW can be comparatively forgiving on dirty or rusty metal.
How to Practice Stick Welding
Don’t start by trying to repair something important.
Start with clean mild-steel coupons.
Stage 1: Strike and restart the arc
Practice starting the arc repeatedly.
Your objective is not a beautiful weld. Your objective is a reliable arc start without excessive sticking.
Stage 2: Straight beads
Run parallel beads across a flat piece of clean steel.
Concentrate on:
- Arc length
- Electrode angle
- Travel speed
- Puddle size
- Consistency
Stage 3: Clean every bead
Allow the work to cool sufficiently before handling it.
Chip the slag carefully and brush the weld clean.
Look at the actual weld rather than judging it through the slag.
Stage 4: Change one variable at a time
If you change amperage, rod diameter, travel speed, and electrode type simultaneously, you won’t know what caused the improvement or problem.
Change one thing.
Stage 5: Move to joints
A sensible progression is:
- Straight beads
- Lap joints
- T-joints
- Butt joints
- Fillet welds
- Horizontal welding
- Vertical welding
- Overhead welding
Do not rush into vertical or overhead welding simply because you can make a decent flat bead.
How to Read a Bad Stick Weld
Your weld bead is a diagnostic tool.
Rod keeps sticking
Check:
- Amperage
- Arc length
- Starting technique
- Polarity
- Electrode compatibility
- Electrode condition
Excessive spatter
Check:
- Arc length
- Amperage
- Polarity
- Electrode selection
- Surface contamination
Tall, narrow bead
Possible causes include:
- Insufficient heat
- Excessive travel speed
- Poor puddle control
Very wide, flat bead
Possible causes include:
- Excessive heat
- Slow travel
- Excessive manipulation
Slag inclusion
Possible causes include:
- Inadequate slag removal between passes
- Incorrect electrode angle
- Poor travel control
- Allowing slag to become trapped ahead of the puddle
- Poor joint preparation
Undercut
Possible contributors include:
- Excessive current
- Excessive travel speed
- Poor electrode angle
- Poor manipulation
Don’t try to fix every defect by increasing or decreasing amperage. Welding problems are usually a combination of variables.
What About Welding Outside?
One of stick welding’s major advantages is its portability.
Because SMAW does not depend on an external shielding-gas cylinder, it can be practical for outdoor work.
But “works outside” does not mean “works safely in any weather.”
You still need to consider:
- Wind
- Rain and moisture
- Wet gloves or clothing
- Electrical safety
- Stable footing
- Fire hazards
- Fume exposure
- Nearby combustible materials
The workpiece and electrodes should be kept appropriately dry, and electrical equipment must be protected from hazardous environmental conditions.
Welding Fumes Are Not Something to Ignore
This is an area where beginner welding guides often fall short.
Welding fumes are not simply harmless smoke.
OSHA identifies welding fumes and gases, UV radiation, burns, electric shock, eye damage, and fire among the hazards associated with welding operations.
NIOSH’s current welding-fume guidance, updated March 9, 2026, specifically discusses manganese in welding fumes and notes that exposure can vary with the electrode, base metal, and welding operation. Confined spaces can significantly increase exposure.
Fume composition also changes depending on the material and coatings being welded. NIOSH notes that welding stainless steel and metals or coatings involving substances such as nickel, chromium, zinc, copper, lead, or cadmium can present additional hazards.
The practical rule for beginners
Do not put your face directly over the welding plume.
Use appropriate ventilation and local exhaust where necessary. Follow the applicable OSHA requirements and your workplace’s hazard assessment.
If you do not know what a coating or material contains, don’t assume it is safe to weld.
Be Especially Careful With Galvanized and Coated Metal
Galvanized steel has a zinc coating.
Heating coatings can generate hazardous fumes. Painted, plated, chemically treated, or otherwise coated metal can present additional hazards depending on the coating.
Before welding questionable material:
- Identify the base metal.
- Identify coatings.
- Review the applicable safety information/SDS.
- Remove coatings only when doing so is appropriate and safe.
- Provide suitable ventilation and exposure controls.
- Follow applicable OSHA and workplace requirements.
For beginners, clean, known mild-steel coupons are the better choice.
Never Weld a Sealed Container
This deserves its own warning.
Do not weld, cut, heat, or modify a sealed or previously used container unless it has been properly evaluated, prepared, and made safe by qualified personnel.
Residual liquids or vapors can ignite or explode when heated.
OSHA’s welding standards specifically address fire prevention, ventilation, and hazards associated with welding and cutting operations.
The same conservative approach applies to fuel tanks, drums, pressure vessels, and unknown containers.
When Should a Beginner NOT Make the Repair?
This is one of the most important lessons in welding.
A good-looking weld is not automatically a safe weld.
Do not use beginner-level SMAW practice as the basis for repairing:
- Vehicle frames
- Trailer frames or critical trailer components
- Lifting points
- Pressure vessels
- Structural members
- Load-bearing equipment
- Critical machinery
- Safety-critical components
These applications may require qualified welders, qualified welding procedures, specified filler metals, inspection, preheat/interpass control, and compliance with applicable codes or standards.
If failure could injure someone, destroy property, or create a serious safety hazard, don’t treat it as a practice project.
Stick Welding vs. MIG: Which Is Easier?
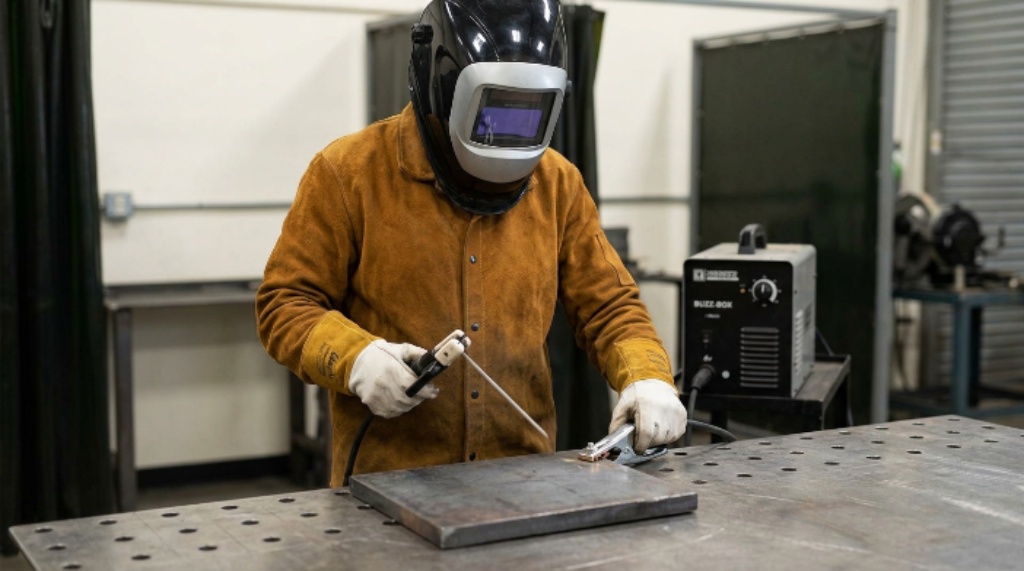
For many first-time hobby welders, MIG is easier to learn because the machine automatically feeds the wire.
Stick welding requires you to:
- Start the arc manually
- Maintain arc length
- Move your hand as the electrode burns down
- Control travel speed
- Manage slag
- Change electrodes frequently
MIG can therefore be a better first choice for clean indoor fabrication.
Stick welding becomes especially attractive when portability, outdoor capability, heavier steel, and field repair are priorities.
Neither process is universally “better.”
Choose the process based on the work you actually intend to do.
A Simple Beginner Stick-Welding Checklist
Before striking the first arc, run through this list:
Workpiece
- Clean, known material
- Properly positioned and clamped
- Suitable thickness for the electrode and machine
Machine
- Correct input power
- Leads and holder inspected
- Correct polarity
- Amperage within the electrode manufacturer’s recommended range
Electrode
- Correct classification
- Correct diameter
- Correct current/polarity
- Properly stored
- Coating intact
Safety
- Welding helmet
- Safety glasses
- Welding gloves
- Flame-resistant clothing
- Appropriate footwear
- Adequate ventilation
- Combustibles controlled
- Fire protection available
Technique
- Stable body position
- Short, controlled arc
- Correct electrode angle
- Consistent travel speed
- Slag removed between passes
Frequently Asked Questions
Is stick welding hard for beginners?
It can be. The equipment is simple, but controlling arc length, electrode angle, travel speed, and the molten puddle takes practice. Starting with straight beads on clean mild steel makes the learning curve much easier.
What is the easiest stick welding rod for a beginner?
E6013 is often a friendly starting point for clean mild-steel practice because many E6013 products have a relatively easy-to-control arc and good slag release. The exact choice should still follow the electrode manufacturer’s recommendations. Lincoln Electric, for example, describes its E6013 Fleetweld 37 as an all-position electrode for clean steel with stable arc characteristics.
Is E6011 or E6013 better for beginners?
For clean mild-steel practice, many beginners find E6013 easier to control. E6011 can be valuable for repair-oriented applications and penetrating work, but the appropriate choice depends on the machine, material, position, and specific electrode.
Why does my stick rod keep sticking?
Common causes include insufficient amperage, an arc that is too short, poor starting technique, incorrect polarity, contamination, or an electrode that does not match the machine’s available current.
Should I push or pull a stick electrode?
For many basic stick-welding beads, a slight drag technique is common, but there is no single angle that applies to every electrode, position, and joint. Follow the electrode manufacturer’s recommendations and focus on keeping the puddle and slag under control.
How long should my stick-welding arc be?
A short, consistent arc is the general beginner goal. A common starting rule is to keep the arc approximately around the electrode’s core diameter, but the correct technique varies by electrode type. The manufacturer’s instructions take priority.
Can I stick weld rusty metal?
SMAW is relatively tolerant of less-than-perfect steel, and certain electrodes are designed for more penetrating or less-clean conditions. That does not mean you should routinely weld through heavy rust, paint, grease, or unknown coatings. Clean the joint whenever practical.
Can I stick weld galvanized steel?
It is possible in some professional applications, but galvanized coatings can create hazardous fumes. Beginners should not treat galvanized welding as ordinary mild-steel practice. Proper preparation, ventilation/exposure controls, PPE, and material-specific safety procedures are important.
Can I stick weld aluminum?
Specialized electrodes exist, but aluminum is not a normal beginner SMAW material. If aluminum welding is your goal, a process specifically suited to aluminum—often TIG or an appropriate MIG setup—may be a better learning path.
Can stick welding be done in the rain?
Stick welding is used outdoors, but wet conditions create serious electrical and safety concerns. Do not weld in conditions where you, the equipment, or electrical connections can become dangerously wet. Follow the welding machine manufacturer’s environmental limitations and applicable safety requirements.
How do I know if my weld is strong?
You cannot determine weld strength simply by looking at the bead.
Visual appearance can identify obvious problems, but actual weld quality may require appropriate inspection or testing. Critical welds should be produced according to a qualified procedure by appropriately trained or qualified personnel.
Final Takeaway
Stick welding isn’t difficult because the machine is complicated. It’s difficult because the welder has to control several variables at the same time.
Start with the fundamentals:
Choose the correct electrode → verify polarity → set the recommended amperage → clean the steel → establish a short arc → maintain the correct angle → control travel speed → clean the slag → inspect the result.
Then repeat.
Don’t chase perfect-looking welds on your first afternoon. Run consistent beads, change one variable at a time, and learn to read what the puddle and finished weld are telling you.
Most importantly, respect the process. Welding involves intense heat, UV radiation, fumes, electrical energy, sparks, molten metal, and fire hazards. OSHA and NIOSH both emphasize the need for appropriate controls, PPE, ventilation, and safe work practices.
If you build good habits on clean practice steel, understand your electrodes, and know when a job is beyond beginner territory, stick welding can become one of the most useful fabrication and repair skills you can learn.
Sources and Technical References
This guide was checked against current guidance and technical resources from:
- Occupational Safety and Health Administration (OSHA), Welding, Cutting and Brazing hazards and standards.
- National Institute for Occupational Safety and Health (NIOSH/CDC), Welding Fumes and Manganese, updated March 9, 2026.
- American Welding Society (AWS), technical guidance on shielded metal arc welding.
- Miller Electric, stick-welding technique guidance.
- Lincoln Electric electrode information and product guidance.