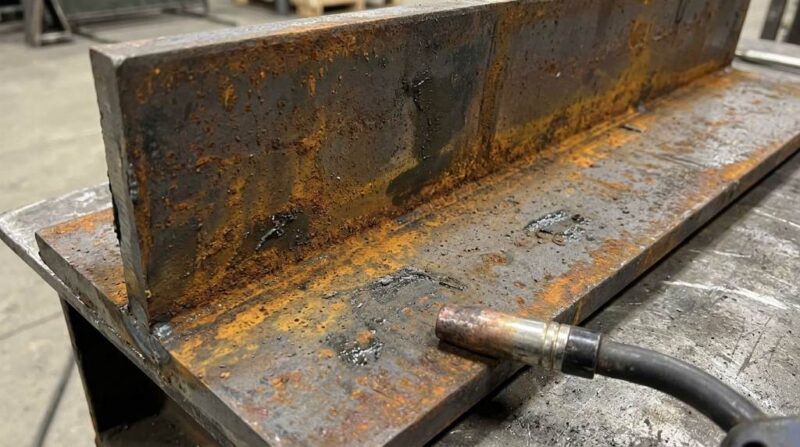

Cleaning a weld joint before welding is a critical step that many welders overlook. According to the American Welding Society, up to 70 percent of welding defects stem from poor surface preparation. A clean joint ensures stronger bonds, reduces spatter, and prevents contamination. This guide will walk you through the best practices to prepare your weld joint like a professional.
Why Cleaning a Weld Joint Matters
Contaminants like rust, oil, and paint can compromise the integrity of your weld. These impurities create weak spots that may crack under stress. Clean surfaces allow for better fusion between the base metal and filler material. This results in a weld that is both strong and durable.
In humid climates, moisture on the metal surface can cause hydrogen-induced cracking. Removing moisture and other contaminants reduces the risk of such defects. Additionally, clean joints help prevent excessive spatter during MIG vs TIG welder processes. This makes your work cleaner and more efficient.
Cleaning also ensures consistent heat distribution during welding. Uneven heating can lead to warping or distortion in the final product. By starting with a clean surface, you set the stage for a smooth and uniform weld bead.
Tools and Materials Needed
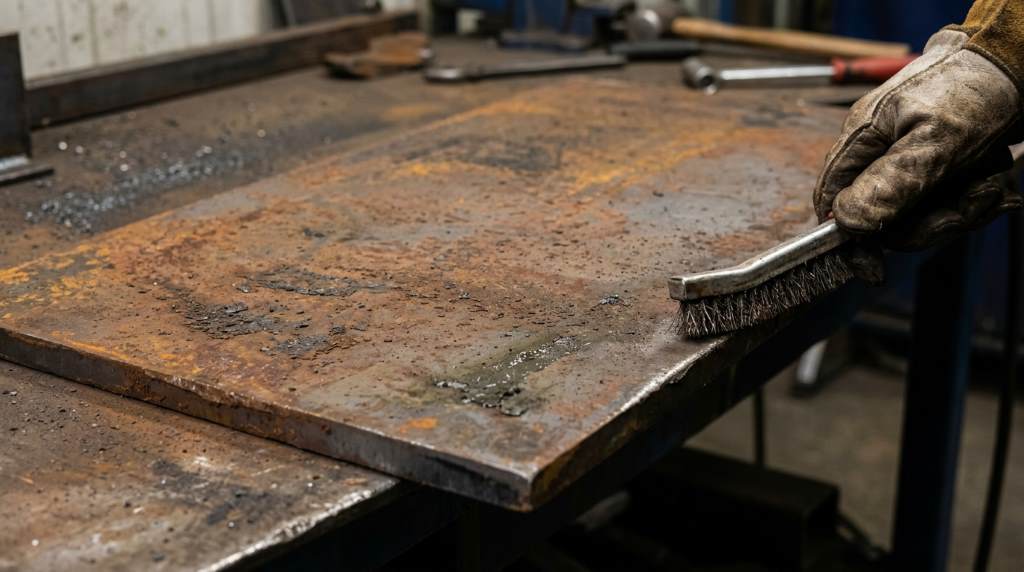
Gather the right tools before you start cleaning the weld joint. A wire brush is essential for removing loose rust and scale. For stubborn contaminants, a grinder or sandpaper may be necessary. Always use tools that match the material you are working with.
For stainless steel or aluminum, a dedicated stainless steel brush prevents cross-contamination. Acetone or a degreaser can remove oils and grease effectively. A clean cloth is useful for wiping down the surface after cleaning. Safety gear like gloves and goggles are a must to protect yourself.
If you are working on a large project, consider using a power tool like an angle grinder. This speeds up the cleaning process for big surfaces. For precision work, hand tools like files and scrapers are more appropriate. Always ensure your tools are in good condition to avoid introducing new contaminants.
Step-by-Step Guide to Cleaning a Weld Joint
Remove Visible Contaminants
Start by removing any visible dirt, rust, or paint from the joint area. Use a wire brush to scrub off loose debris. For thicker layers of rust or paint, a grinder with a wire wheel attachment works well. Be thorough but avoid damaging the base metal.
Pay special attention to the edges of the joint where the weld will be laid. These areas must be completely clean to ensure proper fusion. If the metal has mill scale, a grinding wheel or sandpaper can help remove it. Mill scale can trap moisture and cause welding defects.
After brushing or grinding, wipe the surface with a clean cloth to remove residual dust. This step is often overlooked but is crucial for achieving a clean surface. Inspect the joint to ensure all visible contaminants are gone before moving to the next step.
Degrease the Surface
Oils and grease are invisible but can severely affect weld quality. Use a degreaser or acetone to clean the joint thoroughly. Apply the degreaser with a cloth and let it sit for a few minutes to break down the oils. Then, wipe the surface clean with a fresh cloth.
For industrial applications, specialized cleaning solvents may be required. These solvents are designed to remove tough industrial greases and oils. Always follow the manufacturer’s instructions when using chemical cleaners. Proper ventilation is important to avoid inhaling fumes.
After degreasing, allow the surface to dry completely before welding. Any residual moisture can lead to porosity in the weld. In humid environments, use a dry cloth to speed up the drying process. This step is especially important for outdoor welding projects.
Remove Oxides and Residues
Oxides form naturally on metals like aluminum and stainless steel. These oxides have a higher melting point than the base metal and can prevent proper fusion. Use a stainless steel brush or a dedicated oxide remover for these materials. For aluminum, a chemical cleaner like aluminum brightener can be effective.
For steel, a grinder or sandpaper can remove surface oxides. Be sure to grind in the direction of the weld to avoid creating grooves that could trap contaminants. After grinding, brush off any remaining dust with a clean wire brush. This ensures the surface is ready for welding.
In some cases, a pickling paste may be used to remove stubborn oxides. This paste is applied to the surface and then rinsed off with water. Always wear protective gear when handling pickling paste, as it can be corrosive. After rinsing, dry the surface thoroughly before welding.
Final Inspection and Preparation
Before welding, inspect the joint one last time to ensure it is completely clean. Look for any remaining contaminants, moisture, or residues. Use a bright light and a magnifying glass if necessary to check for fine details. This step is critical for high-precision welding jobs.
If the joint passes inspection, you can proceed with setting up your welding equipment. Ensure your welding machine is properly calibrated for the material and thickness you are working with. For beginners, reviewing welding basics for beginners can provide additional guidance.
For projects involving plastic welding, such as those using an upgraded plastic welder, the cleaning process may differ slightly. Always follow the manufacturer’s recommendations for plastic materials to ensure the best results.
Common Mistakes to Avoid
One of the most common mistakes is rushing the cleaning process. Skipping steps or not cleaning thoroughly can lead to weak welds. Take your time to ensure the joint is free of all contaminants. Another mistake is using dirty tools, which can reintroduce contaminants to the surface.
Avoid using the same brush for different metals, as this can cause cross-contamination. For example, using a steel brush on aluminum can embed steel particles in the aluminum, leading to corrosion. Always use dedicated tools for each type of metal to prevent this issue.
Over-grinding can also be a problem, as it can thin the metal and weaken the joint. Use the right amount of pressure and the appropriate grit for the material. Finally, failing to dry the surface after cleaning can introduce moisture, which can cause porosity in the weld.
Unique Tips for Different Climates
In humid climates, moisture can quickly settle on the metal surface. To combat this, store your materials in a dry environment before welding. Use a moisture absorber like silica gel in your storage area to keep humidity levels low. Additionally, preheating the metal can help drive off any residual moisture.
In cold climates, condensation can form on the metal when it is brought into a warm workspace. Allow the metal to acclimate to the room temperature before cleaning and welding. This prevents condensation from forming on the surface during the welding process.
For outdoor welding in windy conditions, use a windscreen to protect the joint from dust and debris. This is especially important in rural or construction sites where airborne contaminants are common. Always check the weather forecast and plan your welding activities accordingly.
Safety Precautions
Safety should always be a priority when cleaning and welding. Wear protective gear, including gloves, goggles, and a respirator if you are working with chemicals or grinding metal. This protects you from dust, fumes, and flying debris. Ensure your workspace is well-ventilated to avoid inhaling harmful fumes.
When using power tools like grinders, always follow the manufacturer’s safety guidelines. Secure your workpiece to prevent it from moving during cleaning. Keep your tools in good working condition to avoid accidents. Never operate power tools without proper training and supervision.
For chemical cleaners, read the safety data sheets and follow the recommended handling procedures. Store chemicals in a safe and secure location, away from children and pets. Always have a first aid kit nearby in case of accidents.
Conclusion
Cleaning a weld joint before welding is a fundamental step that ensures the strength and durability of your welds. By following the steps outlined in this guide, you can achieve professional-quality results every time. Remember that proper preparation prevents poor performance.
Investing time in cleaning and preparing your weld joints will save you time and frustration in the long run. It reduces the need for rework and ensures your projects meet the highest standards. Whether you are a hobbyist or a professional, mastering this skill is essential for success in welding.
Start applying these techniques in your next project and experience the difference for yourself. Share your results and tips with fellow welders to help improve the welding community as a whole. Happy welding!
FAQ
Why is it important to clean a weld joint before welding?
Cleaning removes contaminants that can weaken the weld and cause defects like porosity or cracking.
What tools are best for cleaning a weld joint?
Use wire brushes, grinders, sandpaper, degreasers, and clean cloths for effective cleaning.
Can I use the same brush for cleaning different metals?
No, using the same brush can cause cross-contamination and corrosion.
How do I remove oxides from aluminum before welding?
Use a stainless steel brush or a chemical cleaner like aluminum brightener to remove oxides.
What safety precautions should I take when cleaning a weld joint?
Wear protective gear, ensure proper ventilation, and follow the manufacturer’s guidelines for tools and chemicals.